
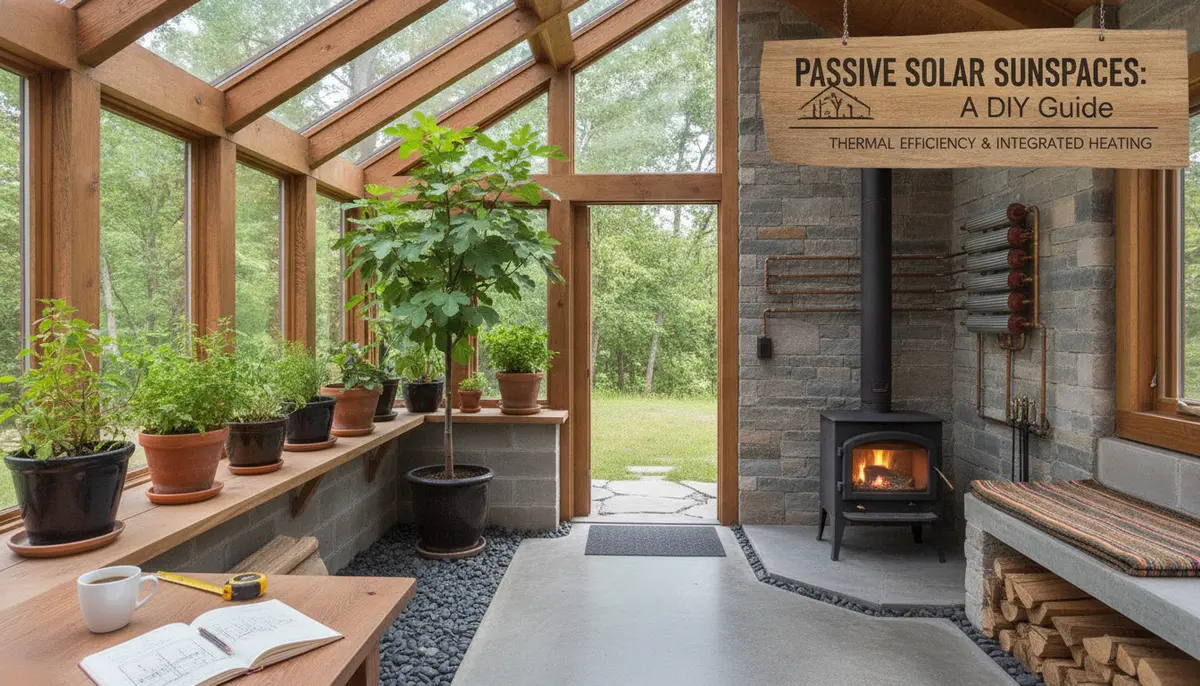
Passive Solar Sunspaces: A DIY Guide to Thermal Efficiency and Integrated Heating
The Sunspace as a High-Efficiency Solar Collector
A sunspace, often referred to as a solar greenhouse or solarium, is more than just a bright room for plants; it is a functional solar collector that you can live in. Unlike active solar systems that rely on complex mechanical parts, a sunspace utilizes passive solar principles to capture, store, and distribute thermal energy. For the DIY enthusiast, understanding the mechanics of a sunspace is the first step toward reducing home energy bills and even supplementing pool heating systems.
The core concept relies on the "greenhouse effect." Short-wave solar radiation passes through the glazing (windows) and is absorbed by the interior surfaces. These surfaces then re-radiate that energy as long-wave infrared radiation, which cannot easily escape back through the glazing. This trapped heat can then be managed through thermal mass and ventilation to provide consistent warmth.
When planning your build, it is essential to consult The PoolHeatHacker Master Buying Guide: Essential Components for DIY Heating to understand how the materials you select for a sunspace—such as pumps for water walls or specialized piping—integrate into a broader energy-management strategy.
Selecting the Right Glazing: Glass vs. Polycarbonate
The "skin" of your sunspace is its most critical component. The glazing determines how much light enters and how much heat stays inside. There are two primary schools of thought for the DIY builder: glass and multi-wall polycarbonate.
Tempered Glass
Glass is the traditional choice. It offers crystal-clear views and does not degrade under UV exposure. However, for a sunspace to be an effective heater, you must use tempered safety glass, which is heavy and requires a robust structural frame. Single-pane glass has a very low R-value (insulation rating), meaning heat will escape quickly once the sun goes down. Double-pane, low-E glass is significantly better for heat retention but comes at a higher price point.
Multi-Wall Polycarbonate
For many DIYers, multi-wall polycarbonate is the superior choice for the roof and non-view walls. It is lightweight, impact-resistant, and provides excellent insulation due to the air channels trapped between the layers.
When installing polycarbonate, ensure the UV-protected side faces outward. While it lacks the perfect clarity of glass, its ability to diffuse light prevents "hot spots," making it better for both plants and uniform heat distribution.
Thermal Mass: The Battery of Your Sunspace
Without thermal mass, a sunspace is a volatile environment—sweltering at noon and freezing at midnight. Thermal mass acts as a "thermal battery," soaking up excess heat during the peak of the day and slowly discharging it as the ambient temperature drops.
Water as Thermal Mass
Water is one of the most effective materials for heat storage because it has a high specific heat capacity. Many DIY sunspaces utilize "water walls"—stacks of 55-gallon drums painted black and filled with water. These drums are placed in the direct path of the sun. As the water heats up, it stores massive amounts of energy that can be used to keep the space warm overnight.
Masonry and Concrete
Concrete floors, brick walls, and stone veneers also serve as thermal mass. To be effective, these materials should be at least 4 to 6 inches thick and dark in color to maximize absorption. A dark slate floor in a sunspace isn't just an aesthetic choice; it’s a functional heat sink.
If you are looking to integrate your sunspace with a pool heating system, you can actually use the pool water itself as part of your thermal mass. By circulating pool water through a heat exchanger located within the sunspace, you can transfer the captured heat directly into your pool. This method is often more efficient than the DIY Solar Pool Heater: The 100ft Poly Pipe Method because the sunspace protects the pipes from wind-chill and ambient heat loss.
Airflow and Distribution: Moving the Heat
A sunspace is only useful to the rest of your home if you can move the heat where it's needed. There are two primary ways to distribute sunspace heat: passive and active.
Passive Distribution
Passive distribution relies on natural convection. By placing vents at the top and bottom of the wall shared between the sunspace and the house, you create a "thermal chimney." Cool air from the house enters the bottom vent, is heated by the sunspace, and rises to re-enter the house through the top vent.
Active Distribution
Active distribution uses fans and blowers to force the warm air into the living quarters. This is often more effective for larger homes or sunspaces that are slightly offset from the main living area.
Using a thermostat-controlled fan ensures that you aren't blowing cold air into your house on cloudy days. The fan should only kick in when the sunspace temperature exceeds the house temperature by a set margin (usually 5-10 degrees).
Preventing Overheating in the Summer
One of the biggest mistakes in sunspace design is failing to plan for the summer months. A structure designed to capture maximum winter sun can easily reach 120°F+ in July if not properly managed.
- Overhangs: A properly calculated roof overhang will shade the vertical glazing when the sun is high in the summer sky but allow the low-angle winter sun to penetrate deep into the room.
- Venting: You must have operable vents at the highest point of the sunspace. Hot air rises, and without an escape route, it will stagnate.
- Shading: External shades or reflective blinds are far more effective than internal ones. Once the solar energy passes through the glass, the heat is already inside. Blocking it from the outside is the goal.
Integrating Sunspace Principles into Pool Heating
For the PoolHeatHacker community, the sunspace represents the ultimate "pre-heater." If you have an attached sunroom or greenhouse, you have a micro-climate that is consistently warmer than the outdoors.
By running a secondary loop of poly pipe or a copper heat exchanger inside the sunspace, you can utilize the "waste heat" of the room to bump your pool temperature. This is particularly effective in the shoulder seasons (Spring and Fall) when the air is too cold for traditional outdoor solar collectors to work efficiently.
To manage this flow, you will need a reliable pump system. Refer to our guide on the Best High-Flow Pool Pumps for DIY Solar Collectors: A Technical Guide to find a pump that can handle the head pressure required to move water from your pool equipment into the sunspace and back.
Construction Tips for the DIY Builder
Building a sunspace is a significant project, but it can be broken down into manageable phases.
- The Foundation: Ensure your floor can support the weight of your thermal mass. A "water wall" of five 55-gallon drums weighs over 2,200 lbs. A reinforced concrete slab is usually necessary.
- Sealing and Insulation: The wall between the sunspace and the house should be well-insulated and tightly sealed. You want to be able to "shut off" the sunspace at night so it doesn't pull heat out of your house.
- Moisture Control: If you are using the sunspace as a greenhouse for plants, humidity will be high. Use moisture-resistant materials like pressure-treated lumber, cedar, or aluminum framing, and ensure your ventilation system can handle the latent heat.
Final Thoughts on Passive Solar Design
A sunspace is a long-term investment in energy independence. By combining the physics of glazing, the storage capacity of thermal mass, and smart airflow management, you create a system that works with the environment rather than against it. Whether your goal is to grow citrus in a cold climate, slash your heating bill, or extend your swimming season, the passive solar sunspace is one of the most versatile tools in the DIYer's arsenal.
By following the principles outlined here and utilizing the technical resources available on PoolHeatHacker, you can build a structure that provides comfort, beauty, and significant energy savings for decades to come.